Introduction to Hand PCB Assembly
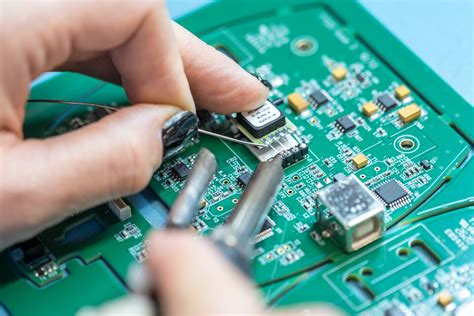
Hand PCB assembly, also known as manual PCB assembly or through-hole PCB assembly, is the process of manually soldering electronic components onto a printed circuit board (PCB). This method is often used for low-volume production, prototypes, or when dealing with components that cannot be machine-placed. In this article, we will provide a comprehensive guide to hand PCB assembly, covering the tools, techniques, and best practices to ensure a successful and efficient assembly process.
Key Components of Hand PCB Assembly
- PCB
- Electronic components
- Soldering tools
- Safety equipment
Preparing for Hand PCB Assembly
Before starting the hand PCB assembly process, it is essential to gather all the necessary tools and materials. This section will cover the preparation steps, including PCB inspection, component organization, and workspace setup.
PCB Inspection
Upon receiving the PCB, carefully inspect it for any defects or irregularities. Check for the following:
- Proper board dimensions
- Correct number and location of holes
- Absence of scratches or damage on the PCB surface
- Proper solder mask and silkscreen alignment
Component Organization
Organizing the electronic components before starting the assembly process can save time and reduce the likelihood of errors. Follow these steps:
- Create a bill of materials (BOM) listing all the required components for the PCB.
- Sort the components by type and value, using labeled containers or trays.
- Verify that all components are present and in the correct quantities.
Workspace Setup
A well-organized and equipped workspace is crucial for efficient and accurate hand PCB assembly. Ensure that your workspace has the following:
- Adequate lighting
- ESD (electrostatic discharge) protection, such as an ESD mat and wrist strap
- Ventilation or fume extraction system for soldering
- Comfortable seating and work surface at the appropriate height

Tools and Equipment for Hand PCB Assembly
Having the right tools and equipment is essential for successful hand PCB assembly. This section will cover the key tools and their uses.
Soldering Iron
A soldering iron is the most critical tool for hand PCB assembly. When selecting a soldering iron, consider the following factors:
- Wattage: Choose an iron with adjustable temperature control and a power rating between 20-60 watts.
- Tip type: Select a tip that is appropriate for the size of the components being soldered.
- ESD safe: Ensure that the soldering iron is ESD safe to prevent damage to sensitive components.
Soldering Accessories
In addition to the soldering iron, you will need the following accessories:
- Solder wire: Use a rosin-core solder wire with a diameter appropriate for the component leads and PCB pads.
- Solder wick: Also known as desoldering braid, this is used to remove excess solder or correct soldering mistakes.
- Flux: Flux helps to remove oxides from the component leads and PCB pads, ensuring a strong solder joint.
- Soldering iron stand: A stand keeps the soldering iron safely in place when not in use.
- Sponge or brass wool: Used for cleaning the soldering iron tip.
Other Tools
Other useful tools for hand PCB assembly include:
- Tweezers: For handling small components and positioning them on the PCB.
- Wire cutters: For trimming component leads after soldering.
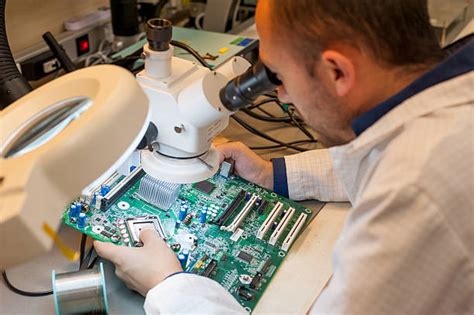
- Magnifying glass or microscope: For inspecting solder joints and small components.
- Multimeter: For testing continuity and verifying component values.

Hand PCB Assembly Techniques
This section will cover the step-by-step process of hand PCB assembly, including component placement, soldering, and inspection.
Component Placement
- Begin by placing the components with the lowest profile, such as resistors and capacitors.
- Insert the component leads through the corresponding holes on the PCB, ensuring the correct orientation.
- Bend the leads slightly outward to hold the component in place.
- Continue placing components, working from the lowest to the highest profile.
Soldering
- Set the soldering iron temperature according to the solder wire manufacturer’s recommendations.
- Clean the soldering iron tip using a damp sponge or brass wool.
- Apply a small amount of solder to the tip to ensure good heat transfer.
- Place the soldering iron tip on the component lead and PCB pad simultaneously.
- Feed a small amount of solder wire into the joint, allowing it to melt and flow around the lead and pad.
- Remove the solder wire and soldering iron, keeping the joint steady until the solder solidifies.
- Trim the excess component lead using wire cutters.
Inspection
After soldering all the components, inspect each solder joint for quality and correctness. Look for the following:
- Shiny and smooth solder joint appearance
- Concave solder joint shape
- Adequate solder coverage of the component lead and PCB pad
- Absence of solder bridges, cold joints, or excessive solder
If any issues are found, use solder wick and flux to remove the defective solder joint, and then resolder the connection.

Best Practices for Hand PCB Assembly
To ensure a high-quality and efficient hand PCB assembly process, follow these best practices:
- Always wear ESD protection when handling PCBs and components.
- Keep the soldering iron tip clean and tinned for optimal heat transfer.
- Use the appropriate solder wire diameter and type for the components being soldered.
- Maintain a consistent soldering temperature and technique throughout the assembly process.
- Regularly inspect solder joints for quality and correctness.
- Take breaks to avoid fatigue and maintain focus during the assembly process.
- Properly ventilate the workspace to minimize exposure to solder fumes.
Troubleshooting Common Hand PCB Assembly Issues
Despite following best practices, issues may still arise during hand PCB assembly. This section will cover common problems and their solutions.
Solder Bridges
Solder bridges occur when excess solder unintentionally connects adjacent pads or component leads. To remove a solder bridge:
- Apply flux to the affected area.
- Place solder wick over the solder bridge.
- Press the soldering iron tip onto the solder wick, allowing the excess solder to be absorbed.
- Remove the soldering iron and solder wick, and inspect the joint to ensure the bridge has been removed.
Cold Solder Joints
Cold solder joints occur when the solder fails to melt and flow properly, resulting in a weak and unreliable connection. Characteristics of a cold solder joint include:
- Dull, grainy, or matte appearance
- Solder not adhering to the component lead or PCB pad
- Solder joint shape is convex or irregular
To fix a cold solder joint:
- Apply flux to the affected joint.
- Reheat the joint with the soldering iron until the solder melts and flows around the lead and pad.
- If necessary, add a small amount of fresh solder to the joint.
- Remove the soldering iron and allow the joint to cool and solidify.
Lifted Pads
Lifted pads occur when a PCB pad detaches from the board due to excessive heat or mechanical stress. To repair a lifted pad:
- Carefully scrape away the solder mask around the lifted pad using a sharp knife or scalpel.
- Apply a small amount of solder to the exposed copper trace.
- Position the component lead on the solder and reheat the joint, allowing the solder to flow and secure the lead to the trace.
- If necessary, apply epoxy or superglue to reinforce the connection and prevent further lifting.
FAQ
- What is the difference between hand PCB assembly and surface-mount assembly?
-
Hand PCB assembly involves manually soldering through-hole components onto a PCB, while surface-mount assembly uses automated machines to place and solder smaller surface-mount components onto the board.
-
Can I use lead-free solder for hand PCB assembly?
-
Yes, lead-free solder can be used for hand PCB assembly. However, lead-free solder typically requires higher soldering temperatures and may be more difficult to work with compared to leaded solder.
-
How often should I replace my soldering iron tip?
-
Soldering iron tips should be replaced when they become worn, pitted, or excessively oxidized. The lifespan of a tip depends on factors such as usage frequency, soldering temperature, and maintenance practices.
-
What should I do if I accidentally overheat a component during soldering?
-
If a component is overheated, it may be damaged or have a shortened lifespan. In this case, it is best to desolder the component using solder wick and flux, and then replace it with a new one.
-
Can I reuse solder wick?
- While it is possible to reuse solder wick, it is generally not recommended. Solder wick becomes less effective at absorbing solder after each use, and reusing it may introduce contaminants to the solder joint. It is best to use fresh solder wick for each desoldering task.
Conclusion
Hand PCB assembly is a valuable skill for electronics enthusiasts, hobbyists, and professionals working on low-volume production or prototypes. By understanding the tools, techniques, and best practices involved in the process, you can successfully assemble PCBs with through-hole components. Remember to prioritize safety, organization, and attention to detail throughout the assembly process to ensure reliable and high-quality results.
| Task | Tools Required | Key Considerations |
|---|---|---|
| PCB Inspection | Visual inspection, magnifying glass | Check for defects, correct dimensions, and proper solder mask/silkscreen alignment |
| Component Organization | Bill of materials (BOM), labeled containers or trays | Sort components by type and value, verify quantities |
| Soldering | Soldering iron, solder wire, flux, solder wick | Select appropriate soldering iron wattage and tip, use the correct solder wire diameter |
| Component Placement | Tweezers, PCB | Place components from lowest to highest profile, ensure correct orientation |
| Joint Inspection | Visual inspection, magnifying glass, multimeter | Check for shiny, smooth, and concave solder joints, test continuity and component values |
By mastering the art of hand PCB assembly, you can bring your electronic projects to life and develop a deeper understanding of the intricate world of electronics. With practice, patience, and attention to detail, you’ll be well on your way to creating professional-quality PCBs using manual assembly techniques.

Leave a Reply